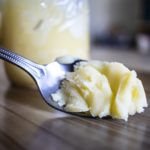
It was the first weekend of our program when our teacher gathered us around a small table with a single propane burner. He was going to show us how to make ghee. I’ve known about ghee and its mystical powers for a long time, but due to its long transformation process, I have never taken on the task of trying to make it. This process, however, was different from the recipes I had seen before. It was so simple and involved a lot less labor. Since that day ghee has become a staple in my home. The smooth texture and sweet nutty caramel flavor notes have made it a source of comfort in my diet. Its oily unctuous quality help to build Ojas in my system, support my immune system, and nourish my tissues.
You may be wondering what sets ghee apart from its previous state of butter. Well, as the butter heats up the milk solids cook and fall to the bottom of the pot. Among these solids are lactose, whey, and casein. Removing these substances from the butter allow it to become easier to digest. These substances can also build ama or toxins in the body when the digestion system is not capable of fully breaking them down. Though some parts of the butter are removed many of the beneficial substances remain. Ghee is loaded with fat-soluble vitamins, CLA’s, and short chain fatty acids. These vitamins and acids nourish all levels of the body.
Another added bonus is the level of stability that is created. Removing the milk solids allow ghee to stay fresh longer than butter. It also takes on a higher smoke point than butter making it a superior oil to use for cooking.
Ayurveda has used ghee for years as a tool of health. From consuming large amounts of ghee to prepare the body for cleansing to feeding the fire at ceremonial gatherings, ghee has a plethora of medicinal and ceremonial uses.
When it comes to making ghee, quality is everything. I always aim to use organic cultured butter from happy cows that were fed a grass diet and have not been treated with hormones and other nasty chemicals. If organic butter isn’t in your budget try to get Kerrygold. Their butter may not be organic but its a great quality butter made from grass-fed cows.
The process of making ghee is just as sacred as the finished product. The whole process can take a little bit of time and I enjoy spending that time thinking about the wonderful meals that I will cook for my friends and family with it. I thank it for being a source of nourishment. Sometimes, I will even chant a prayer thanking the Gods for this golden elixir.
To make ghee you will place cubed butter into a pot on the stove and allow the butter to melt fully on low heat before starting the cooking process.
Once the butter is fully melted, you can increase the heat to a medium-low.
The butter will start to separate, and as it begins to simmer you will hear it start to “pop” or “ting”. This sounds a lot like rain falling on a tin roof. Once the cooking process has begun the butter will split into three levels. The milk solids will fall to the bottom to cook, the milk fats will stay in the middle and become clear, and as gasses are released they will float to the top to create a white foam. Contrary to what many believe, you can leave this foam on the top. Scraping it off wastes a lot of ghee in the process. As the ghee cooks most of the foam will sink to the bottom and the rest will be removed in the straining process.
As the milk solids cook they will release a nutty, caramel-like aroma. This is what separates ghee from clarified butter and gives it its wonderful rich flavor.
When the ghee is done cooking the tin roof sound will slow down, there will be a noticeably less amount of foam on the top and you will be able to see the milk solids on the bottom of the pot.
During the cooking process, you’ll want to avoid stirring up the pot and allow the milk solids to cook. If you would like you can tip the pot slightly to keep the solids from sticking but do this cautiously.
Once the ghee is done you can pour it through a strainer and into the jar you are going to store it in.
For this process, I prefer using two fine mesh metal strainers. You can also use straining linen or cheesecloth. I stay away from cheesecloth because it’s not a reusable resource. Its also not a bad idea to use a funnel to ensure that you get all of the ghee into the jar and not onto the counter. It’s a sad day when half of your ghee gets licked up by the dogs because it dripped down the side of the pot and onto the floor.
Ghee can be stored on the counter for a month with an airtight lid. Always use a clean spoon to reduce contamination. Clean ghee is happy ghee.
Simple Home Made Ghee
Ingredients:
1 pound organic cultured butter
How to make it:
Cut the butter into 1-inch cubes and place in a pot on low heat
Allow the butter to fully melt, don’t stir the butter, just let it do its thing
Once the butter is fully melted turn the head up to a medium-low
Cook the butter on medium-low heat until all of the water has cooked out and the milk solids have fully separated
Removed from the burner and allow to cool for a few moments
Set up strainer
Pour ghee through a strainer into a glass container
Allow for it mostly cool before lidding with an airtight lid
Be sure to keep water from getting into the ghee and always use a clean spoon to prevent the ghee from spoiling.


